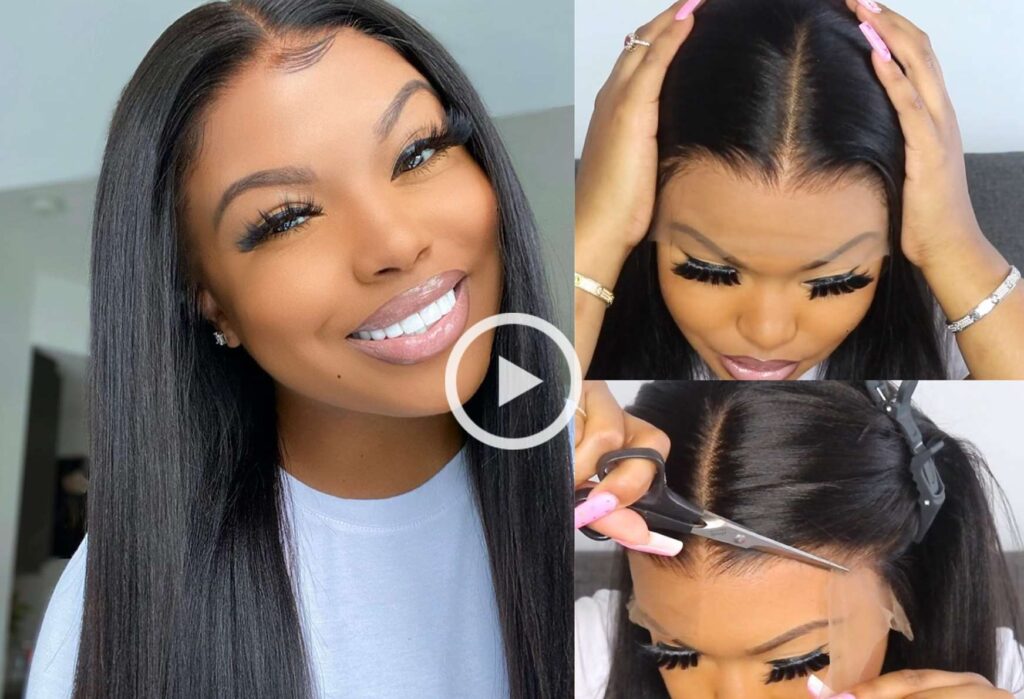
Preparing Lace Wig for Application:
1. Clip all hair and baby hair away from the edge of the wig. This will prevent the hair from getting stuck in the glue when applying the unit.
2. Cautiously cut the lace around the entire hairline. You may cut all the lace off or you can leave a little of the lace if you feel more comfortable doing so. **Make sure all baby hair is carefully pinned back so it is not cut.
3. *OPTIONAL*: When you have completed cutting the lace around the entire perimeter, you can spray “Fray Block” on the edge of the lace to prevent it from fraying. (Please be sure to use this sparingly, because it can try white if you use too much.)
Preparing Skin and Hair for Application:
1. Wash , condition and dry your hair. After your hair is dried either braid hair in small cornrows, or tightly wrap your hair for a flat look.
2. Wash your face completely. Then using cotton balls, use alcohol to clean around your entire hairline, to remove any oil that may be on your skin.
3. *OPTIONAL* Apply scalp protector or liquid band aid to prevent skin from adhesives. This will act as a barrier between your skin and the adhesive. (This step is very important for those who workout, swim or those with sensitive skin.)
*RECOMMENDED* For those with hair, put on a flesh-toned wig cap, and line it up with your hairline, so it is completely covered. This will work as a protective layer for your hair, and will also create a scalp illusion under your hairline. (Make sure the wig cap is pulled taught onto your hairline.) FYI: To prevent the wig cap from slipping, allow the glue and/or tape to overlap onto the nylon stocking cap or loosely stitch the cap in place.
Application Routine #1: (for those using liquid adhesives)
1. Start with a Q-Tip or a small make-up brush and apply a thin coat of the glue around the perimeter of your hairline. Use the liquid adhesives sparingly; using a lot of the adhesive will add to the drying time.
Soft bond adhesives (I.e.: Vapon No-Tape, Ultra-Hold and Invisi-bond) must dry or get tacky . To aide the drying time, use a hand held blowdryer on a cool/warm setting until dry or tacky. *Do NOT bond lace wig to wet glue, the wig will not set properly and will not stick well.
Hard bond adhesives (I.e.: Endurabond, Dermabond and Base bond) do NOT require any drying time, since they dry immediately after it is applied.
2. After your glue is ready for application, you must position the lace wig on your head. To make sure it is aligned properly, you must first bond the wig at the center of your front hairline. (The center point can be determined by parting the hair down the middle and aligning it with the center of your forehead or widows peak.) Then going from one side to the other, press the edge of the wig down into the adhesive using a fine tooth comb. *FYI* If you made an error when applying use a Q-Tip and alcohol between the lace and your skin to release and reapply the wig.
3. Double check your hairline and touch-up any areas where the wig is not applied securely. If you need to remove any excess glue use a Q-Tip and the corresponding solvent.
4. When you have completed the application process, tie down your hairline with a silk or satin scarf. This will allow the glue to set and dry properly. You may also sit under a dryer during this step to aide in the drying process.
*IMPORTANT* For those who want to use a tape and glue combination, the glue should go on your skin and the tape should go on the lace. This will actually protect the lace from the wear and tear of the liquid adhesives.
For those who want an even stronger hold, you may apply glue on the tape as well, just be cautious.
Application Routine #2 (for those who use tape):
1. Make sure your skin, hair and wig are clean and dry. (Follow the “Preparing Wig and Skin for Application” instructions.)
2. Cut the tape into desired shapes, you want the tape to contour your hairline.
3. Peel the paper from one side of the double-sided tape and apply the strips of tape around the perimeter of the lace wig. Press firmly into place. *IMPORTANT* You should leave small spaces between the tape to allow for water to escape, if you will be wearing this for extended periods of time.
4. Position the lace wig on head, and starting with the center, go from side to side, pressing the wig down in sections with a fine tooth comb. Press firmly, for a
5. When you have completed the application process, tie down your hairline with a silk or satin scarf. This will allow the glue to set and dry properly. You may also sit under a dryer during this step to aide in the drying process.
Removal of Your Lace Wig
It is very important to allow the adhesive remover to completely saturate and the lace to release prior to trying to remove the unit. This will preserve the lace on your unit and your hairline. PLEASE take your time while doing this.
1. Spray your adhesive remover on top of the glue and lace.
2. Wait for the unit to completely release. You may also use a Q-Tip to apply the remover/solvent between the lace and your skin.
*IMPORTANT* You want the glue to remain on your skin, not the lace.
3. Use adhesive remover/solvent to clean the adhesive from your skin.
4. Wash lace wig to clean and remove any glue residue that might be on the lace and in the hair of the wig.

